Graphic World

Categories
Articles Learning

Introduction To Auto desk AutoCAD | DAY 20

Learn AutoCAD basics: DAY 20

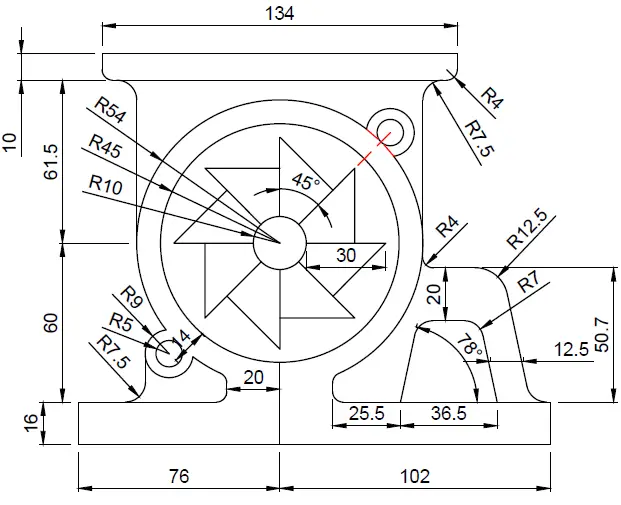
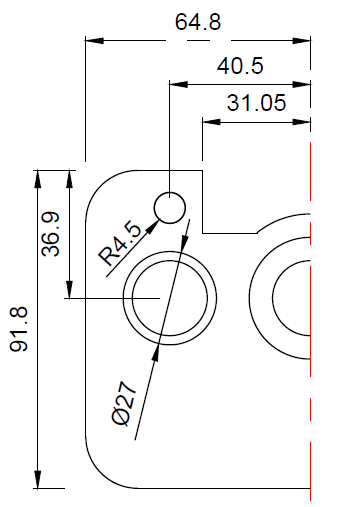
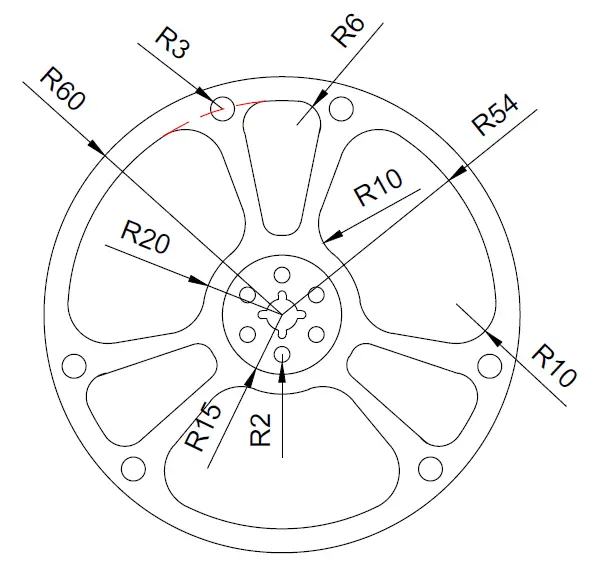
Nothing new under the sun. Here we come again with a bushy one.

Today, you will need the ARRAY command, the FILLET command and the OFFSET command (we made an extensive use of the OFFSET command in DAY 7). There is no need to mention that you will need the LINE command, the CIRCLE command, may be the ROTATE command too.

LEARN AUTOCAD BASICS

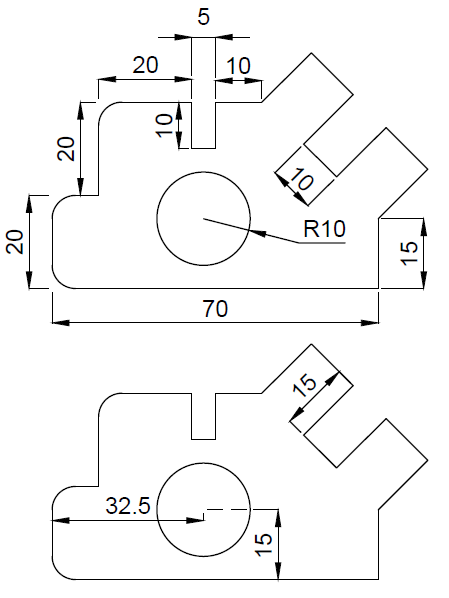
FIGURE 1

learn-AutoCAD-Bacis

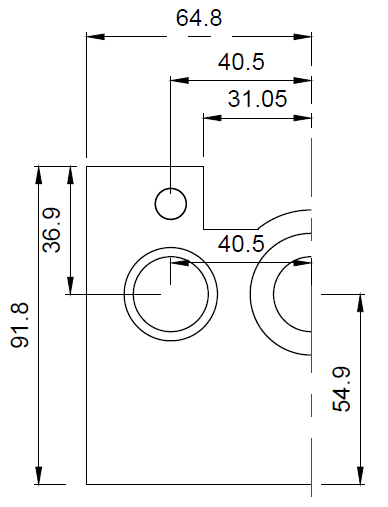
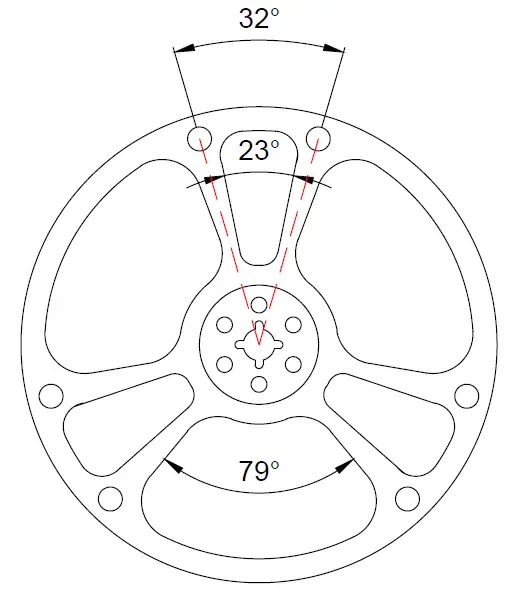
FIGURE 2

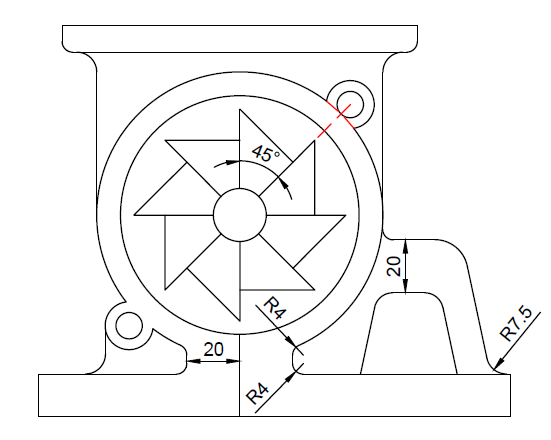
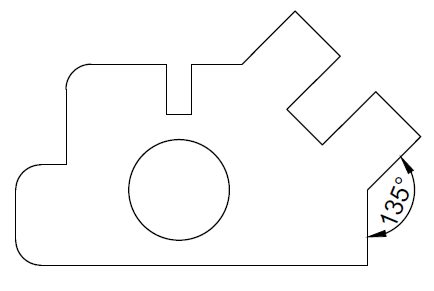
The following image provides some additional information needed to perform the exercise with success.

learn-AutoCAD-Bacis

For the sake of exercising with the HATCH command, you can HATCH the above project at the end if you wish.

Categories
Articles Learning

Introduction To Auto desk AutoCAD | DAY 15

Learn AutoCAD basics: DAY 15

In this post, we are going to be perfecting how to handle positioning in AutoCAD.

The Object SNAP mode will be important for this session, The exercise itself is an easy one, but you need to be a bit cautious about where each of the object is placed in the project.

The use of the OFFSET command will be helpful and the ability to create a circle with the feature Tan, Tan, Radius.

LEARNING AUTOCAD BASICS

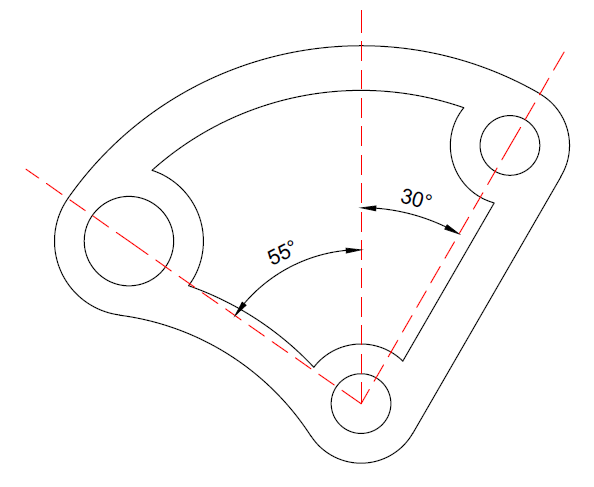
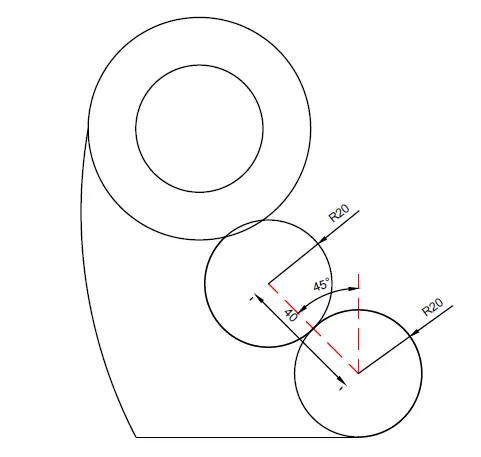
The following is the exercise we are going to be using in this session.


FIGURE 1

learn-AutoCAD

Additional important information are brought using the following image.

FIGURE 2

learn-AutoCAD

hey! If you have any confusion about this, Just leave a comment below. Let me know what is confusing about this, I will make it clear for you

EXECUTION

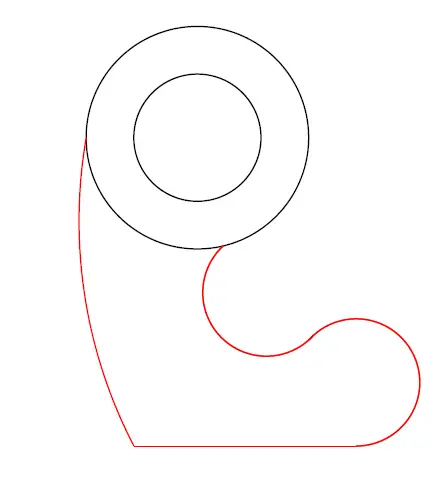
The following is the key image which will help complete this project.

learn-AutoCAD-Bacis

You need to first get the above image then Trim it, and you should get the following.

learn-AutoCAD-Bacis

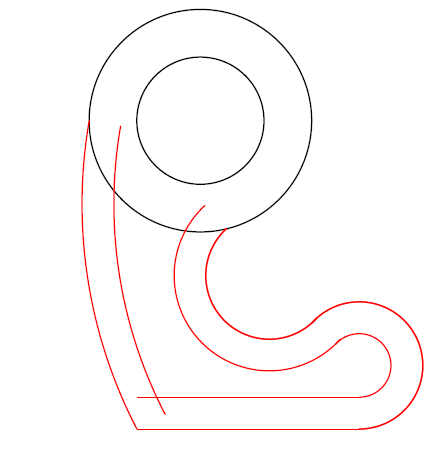
What you need to do now is: Give the red part an OFFSET of 10 units, and you will end up with the following.

learn-AutoCAD-Bacis

It is all clear now, you surely know what to do next to complete today’s task. Do not forget the two FILLET of R5 we have just below the two circles.

Categories
Articles Learning

Introduction To Auto desk AutoCAD | DAY 10

Learn AutoCAD basics: DAY 10

One of the command we have not been using since the beginning of this series is the MIRROR command. We expect to force its use with today’s session.

Today’s rule will be a bit altered in the sense that we wish you use the MIRROR command. How? If you look closely at the image below you will notice that the object is a sort of symmetric. Imagine a vertical line cutting it into two, both sides will be just identical mirrored copies.


LEARNING AUTOCAD BASICS

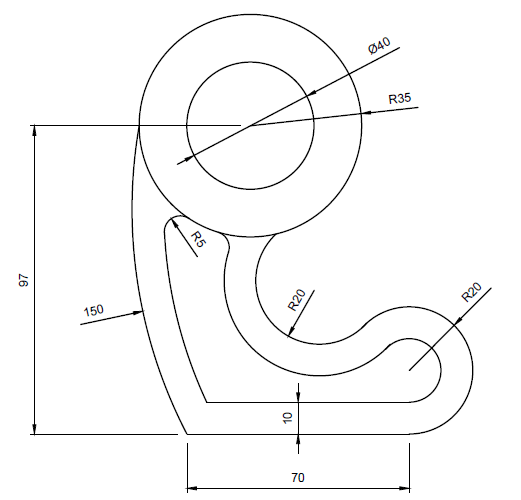
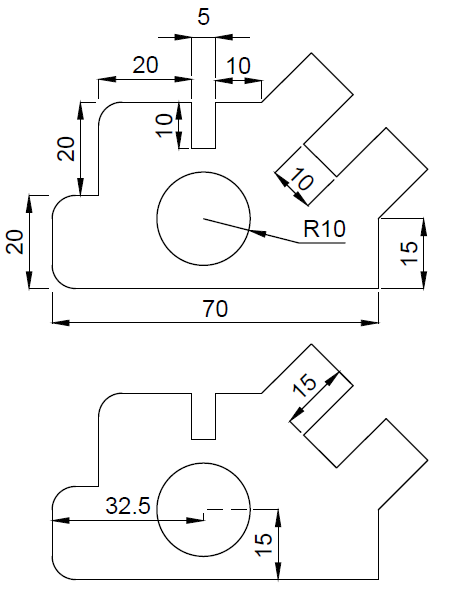
Here is the object of today’s experiment.

learn-AutoCAD

We’ve said earlier that the object is symmetric, let’s see what a part of it would look like. (The line in red seeing as the line of symmetry)

learn-AutoCAD

After removing all FILLET, here is what the image looks like

learn-AutoCAD

Here are some information that might be helpful

learn-AutoCAD

You can just do the inverse operation to mount that object walking from the last image right above this to the first image we had in the beginning of this session.

Categories
Articles Learning

Introduction To Auto desk AutoCAD | DAY 7

Learn AutoCAD basics: DAY 7

The present is one of a kind. It is good to know that the objective is not only to be able to useAutoCAD commands but also to use-your-brain-cells to help combine all these commands to get to the final image.

One thing you should have in mind is that there is more than a way to get to a destination using AutoCAD, just remember to check your dimensions at the end of the exercise and make sure they match ones mentioned on the image-exercise.

We will look a little deeper into the OFFSET command today. It is needed.

OFFSET COMMAND IN AUTOCAD
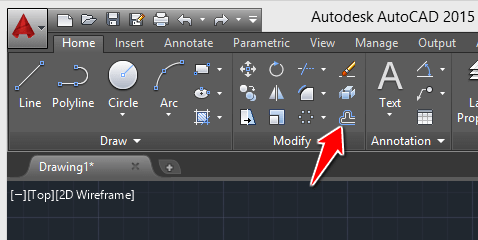
learn-AutoCAD

The OFFSET command helps create parallel lines and parallel curves.

If you have a object and want a similar parallel object to it, this command will be helpful.
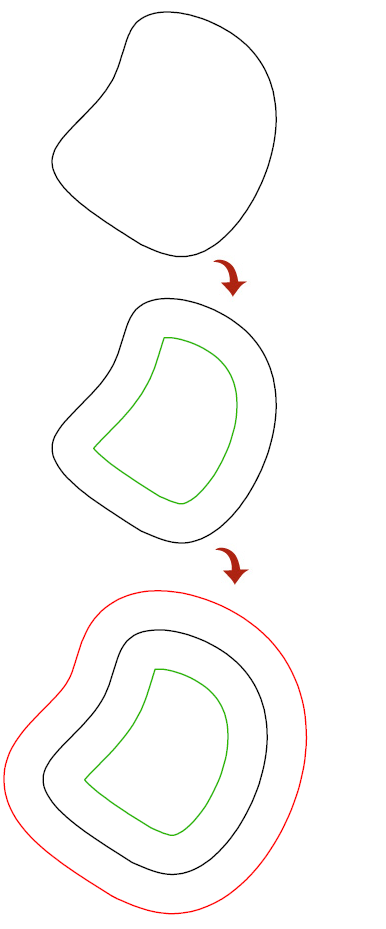
learn-AutoCAD

To use the OFFSET command

  1. Click on the OFFSET icon
  2. Specify the OFFSET distance and Press Enter
  3. Select object to OFFSET
  4. Specify a point on side to OFFSET

LEARNING AUTOCAD BASICS

The use of the ROTATE command will be required in this exercise, as well as the OFFSET command.

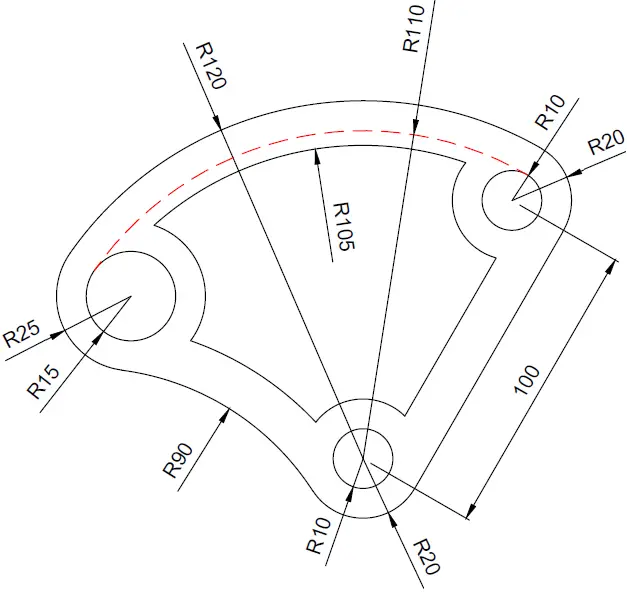
Below you will find diverse dimensions to help the replication of this session’s task.

FIGURE 1
learn-AutoCAD

FIGURE 2

learn-AutoCAD

EXECUTION

You need to start from the outer part of the object.
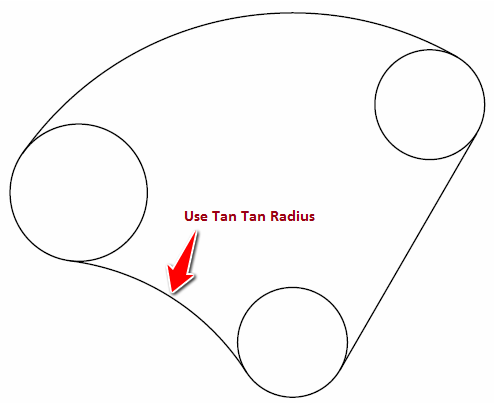
learn-AutoCAD

After getting the above figure done, OFFSET all circles with 10 units inwards, and OFFSET all line with 15 units inwards.

And you should end up here.
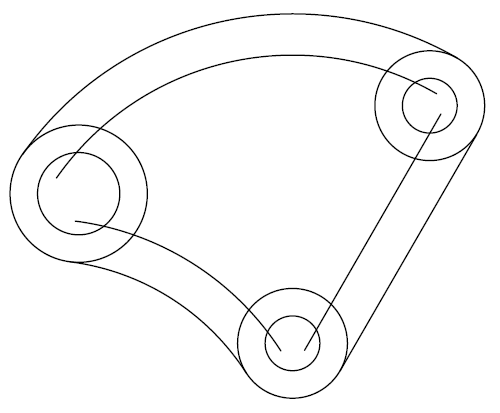
learn-AutoCAD

All you need to use the TRIM command and the FILLET command to get all done.

Categories
Articles Learning

Introduction To Auto desk AutoCAD | DAY 6

Learn AutoCAD basics: DAY 6

In this session we will be challenging ourselves to learn how to play with the ARRAY command in AutoCAD.

The image below is one of those that may best serve this purpose. It is to be noted that all slots are equally spaced around the circles.

Feel free to visit the post where we practiced and talked about the use of the ARRAY command in AutoCAD.

LEARNING AUTOCAD BASICS

There is not much to be done in this one but the proper use of the ARRAY command. All you will need is to have mastered the TRIM command, the LINE command, the FILLET command and theCIRCLE command.

Below we have split annotations in different figures to avoid having a bushy image. Combine all information available on the figures if you want to accurately replicate today’s exercise.

FIGURE 1

learn-AutoCAD

FIGURE 2

learn-AutoCAD

FIGURE 3

Piece in the center of the exercise.

learn-AutoCAD

EXECUTION

The following image might be helpful to you to have a good start

learn-AutoCAD

After proper TRIMMING, you will be left with the following

learn-AutoCAD

Now all you need to do is to use the FILLET command to round edges and create objects that are in the center of the figure.

Categories
Articles Learning

Introduction To Auto desk AutoCAD | DAY 5

Learn AutoCAD basics: DAY 5

Hope we have providing some insights to you with this series of learning AutoCAD through exercises.

We previously worked on exercises that helped us master the following:

  • The use of the LINE command in AutoCAD
  • The use of the CIRCLE command in AutoCAD
  • The use of the TRIM command in AutoCAD
  • The USE of the UCS command in AutoCAD
  • and more


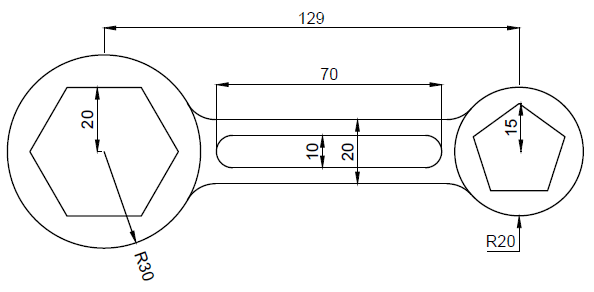
Today, we are going to continue learning and the object that will allow us do that is shown below.

learn-AutoCAD

As you can see the only added tools here is the POLYGON command which you will have to learn if you want to successfully replicate the image above.

LEARNING AUTOCAD BASICS

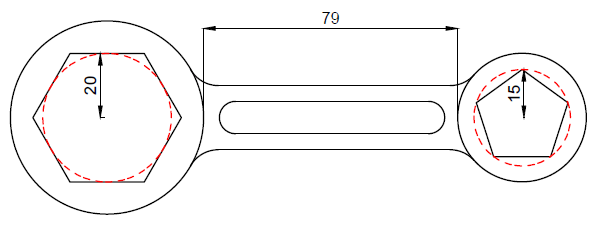
It is important to have you see the following.

learn-AutoCAD

It is important to understand that the two polygons do not have same characteristics. The Polygon on the left side of the image is a 6 side polygon circumscribed about a circle of R=20 and the Polygon on the right is a 5 side polygon inscribed in a circle of R=15. (illustrated on the image using the dashed red circle)

All fillet are R=10 units and remember that you need to learn how to create a polygon in AutoCAD before attempting to do this exercise.

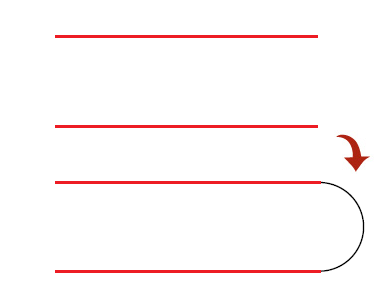
A TRICK YOU CAN USE

It is possible to use the FILLET command on two parallel lines.

learn-AutoCAD

Using all we have learned in previous sessions you should be able to come out of this one without any hassle.

Categories
Articles Learning

Introduction To Auto desk AutoCAD | DAY 4

Learn AutoCAD basics: DAY 4

The following should have nothing new to you if you have been here since the beginning. In this session, we are going to make good use of what we have learned so far.

The image below will serve as today task.

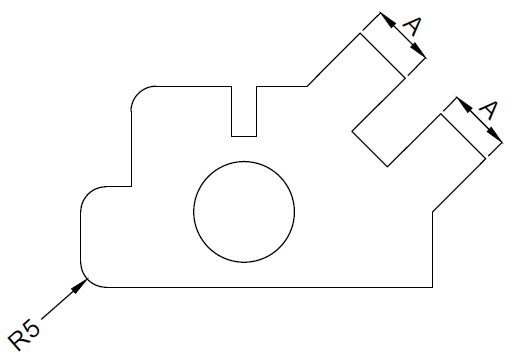
All Fillet in the following exercise are 5 units. (Learn more about the FILLET command in AutoCAD)

learn-AutoCAD

LEARNING AUTOCAD BASICS

You do not need to know the dimension of A to be able to accurately replicate the exercise. But it is crucial to know that the value of those lines are the same, that is the reason we called it A.

As I said earlier, all FILLET are R=5. We have 3 FILLET in the following exercise.

learn-AutoCAD

You will need to use the UCS command to place the circle at its appropriate distance using the same technique we used in the last session.

The following information will also be important to know.

learn-AutoCAD

Basically, there is nothing added than the FILLET command here. Ignore the FILLET, complete the figure and you can get those FILLET done at the end of the task.

Feel free to drop your thoughts below in case of any question or pinion.