Graphic World

Categories
Articles Learning

Introduction To Auto desk AutoCAD | DAY 20

Learn AutoCAD basics: DAY 20

Nothing new under the sun. Here we come again with a bushy one.

Today, you will need the ARRAY command, the FILLET command and the OFFSET command (we made an extensive use of the OFFSET command in DAY 7). There is no need to mention that you will need the LINE command, the CIRCLE command, may be the ROTATE command too.

LEARN AUTOCAD BASICS

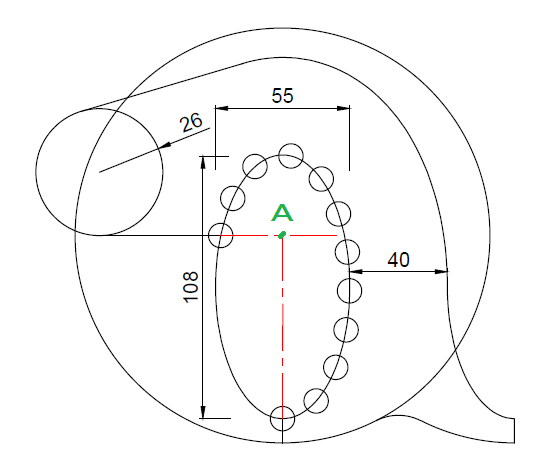
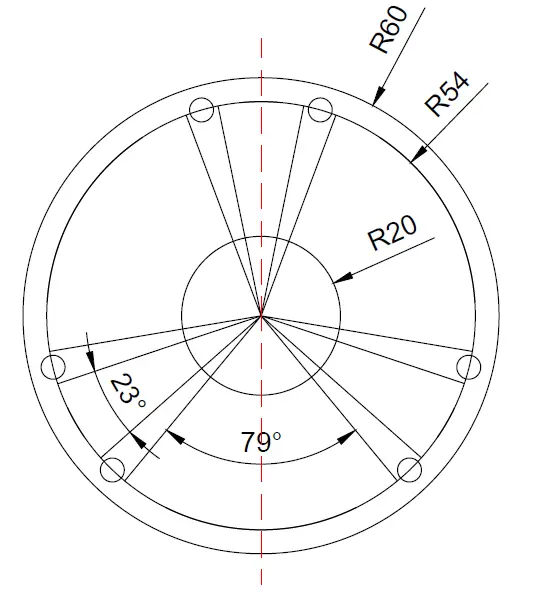
FIGURE 1
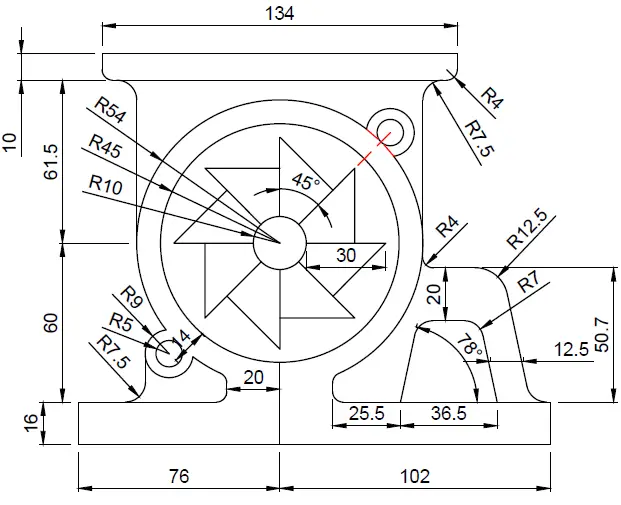
learn-AutoCAD-Bacis

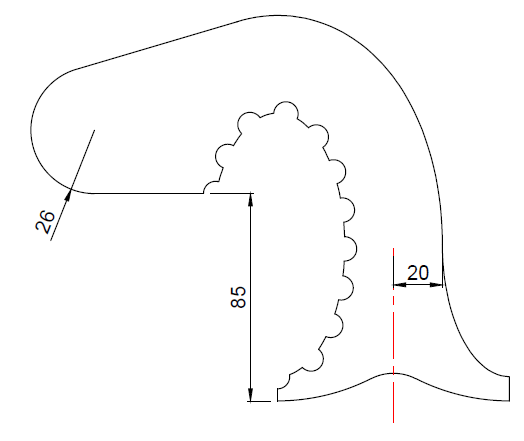
FIGURE 2

The following image provides some additional information needed to perform the exercise with success.
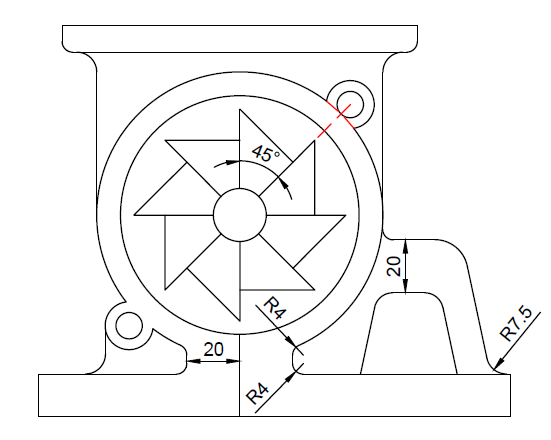
learn-AutoCAD-Bacis

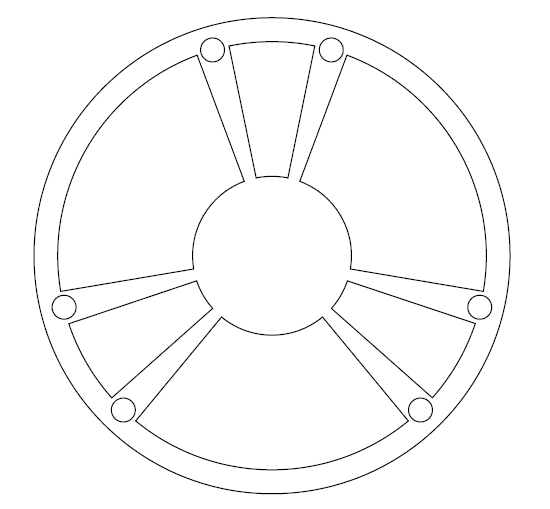
For the sake of exercising with the HATCH command, you can HATCH the above project at the end if you wish.

Categories
Articles Learning

Introduction To Auto desk AutoCAD | DAY 16

Learn AutoCAD basics: DAY 16

In this Learn AutoCAD basics DAY, we have learned how to grow an array on an ellipse. Today we are going to combine that skill with others to complete today’s project.

That being said, we will suggest you to master the experiment we made on DAY 12 and the use of the ARRAY command in AutoCAD before trying this one out.


LEARNING AUTOCAD BASICS

The following is the image of today’s experiment.

learn-AutoCAD-Bacis

hey! If you have any confusion about this, Just leave a comment below. Let me know what is confusing about this, I will make it clear for you

EXECUTION

Now, we would love to provide the following images. Those will contribute to make you see clearly how you should proceed .

You can notice an ellipse of 55 x 108 on the figure below, it is what you have to use to create the array. Those small circles are equally spaced around the path of the array.

The center of the Big circle is shown on the image below and denoted by A.

learn-AutoCAD-Bacis

The following image gives a dimension that will be important while designing.

learn-AutoCAD-Bacis

The red line on the last image shows a line of symmetry that will be used to get the down part of the object completed.

Note you will be required to use the OFFSET command in this exercise.

Categories
Articles Learning

Introduction To Auto desk AutoCAD | DAY 6

Learn AutoCAD basics: DAY 6

In this session we will be challenging ourselves to learn how to play with the ARRAY command in AutoCAD.

The image below is one of those that may best serve this purpose. It is to be noted that all slots are equally spaced around the circles.

Feel free to visit the post where we practiced and talked about the use of the ARRAY command in AutoCAD.

LEARNING AUTOCAD BASICS

There is not much to be done in this one but the proper use of the ARRAY command. All you will need is to have mastered the TRIM command, the LINE command, the FILLET command and theCIRCLE command.

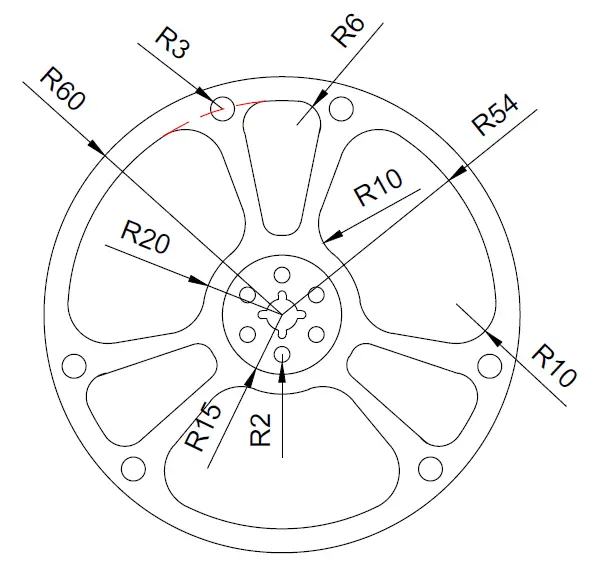
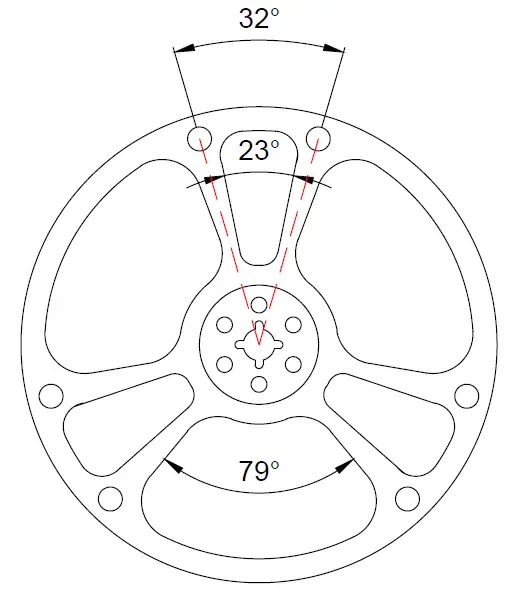
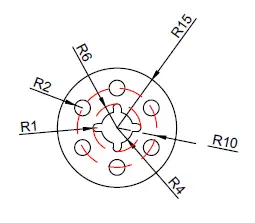
Below we have split annotations in different figures to avoid having a bushy image. Combine all information available on the figures if you want to accurately replicate today’s exercise.

FIGURE 1

learn-AutoCAD

FIGURE 2

learn-AutoCAD

FIGURE 3

Piece in the center of the exercise.

learn-AutoCAD

EXECUTION

The following image might be helpful to you to have a good start

learn-AutoCAD

After proper TRIMMING, you will be left with the following

learn-AutoCAD

Now all you need to do is to use the FILLET command to round edges and create objects that are in the center of the figure.