Graphic World

Categories
Articles Learning

Introduction To Auto desk AutoCAD | DAY 21

Learn AutoCAD basics: DAY 21

We have hit the last DAY of the series, and we hope we have provided you with some insight and that those will help you and give you more confidence to walk further toward your being a Pro AutoCAD user.

In this session we will rush a little bit, and learn few things you need to learn before closing.

Things we are going to be pushing forward in the following lines, are

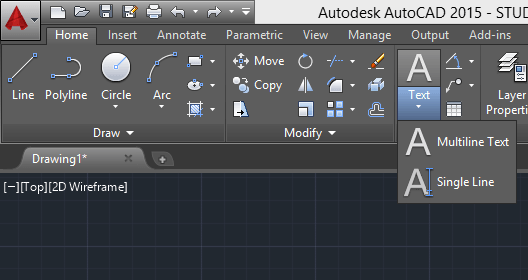
  • How to you write a text in AutoCAD
  • Working with Layers in AutoCAD
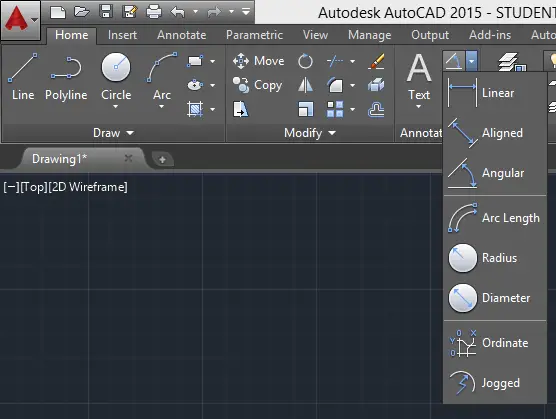
  • How to annotate in AutoCAD

All will be covered just from the basics point of view, but the most important will be covered.


LEARNING AUTOCAD BASICS

ANNOTATION IN AUTOCAD
learn-AutoCAD-basics-in-21days

Learn more about Annotation in AutoCAD

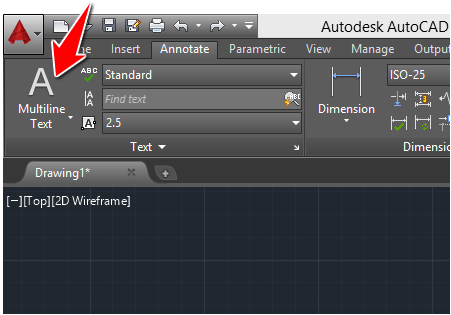
TEXT IN AUTOCAD
learn-AutoCAD-basics-in-21days

This can also be reached from the HOME tab
learn-AutoCAD-basics-in-21days

annotation

WORKING WITH LAYERS IN AUTOCAD

hey! If you have any confusion about this, Just leave a comment below. Let me know what is confusing about this, I will make it clear for you

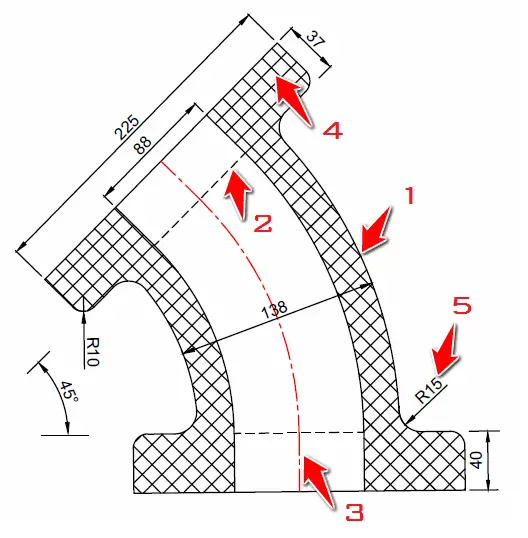
The following image will serve as an exercise.
learn-AutoCAD-basics-in-21days

This is nothing but the image we worked on DAY 19, Now the task will be to create 5 Layers, and place each of the part of this project in its appropriate layer.

Layer 1: the Object itself
Layer 2: The Dashed lines
Layer 3: The center line
Layer 4: HATCH pattern
Layer 5: Annotations

Your layer properties manager window should look like the following.
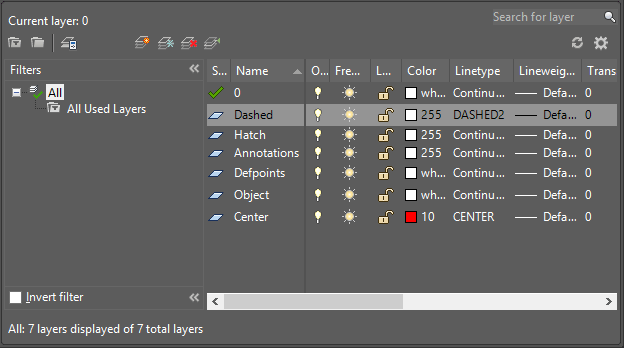
learn-AutoCAD-basics-in-21days

Learn more about creating LAYERS in AutoCAD

Categories
Articles Learning

Introduction To Auto desk AutoCAD | DAY 20

Learn AutoCAD basics: DAY 20

Nothing new under the sun. Here we come again with a bushy one.

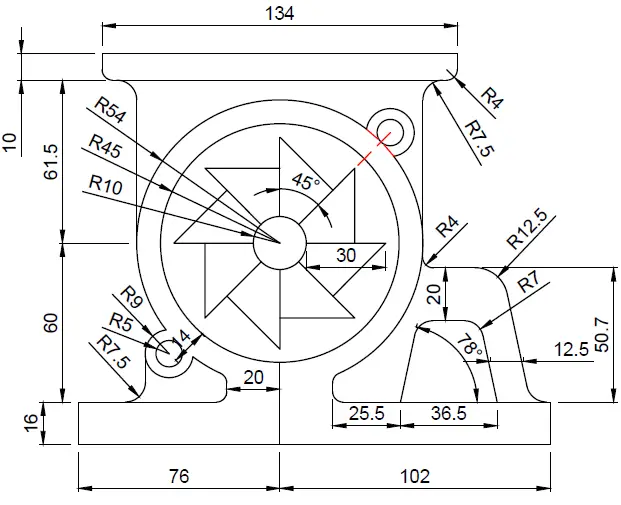
Today, you will need the ARRAY command, the FILLET command and the OFFSET command (we made an extensive use of the OFFSET command in DAY 7). There is no need to mention that you will need the LINE command, the CIRCLE command, may be the ROTATE command too.

LEARN AUTOCAD BASICS

FIGURE 1

learn-AutoCAD-Bacis

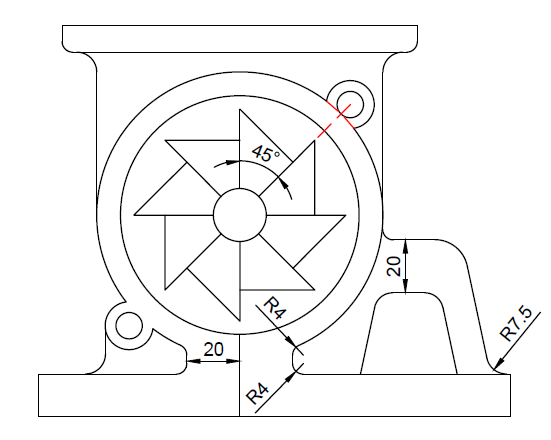
FIGURE 2

The following image provides some additional information needed to perform the exercise with success.

learn-AutoCAD-Bacis

For the sake of exercising with the HATCH command, you can HATCH the above project at the end if you wish.

Categories
Articles Learning

Introduction To Auto desk AutoCAD | DAY 19

Learn AutoCAD basics: DAY 19

It is time to try the HATCH command in AutoCAD.

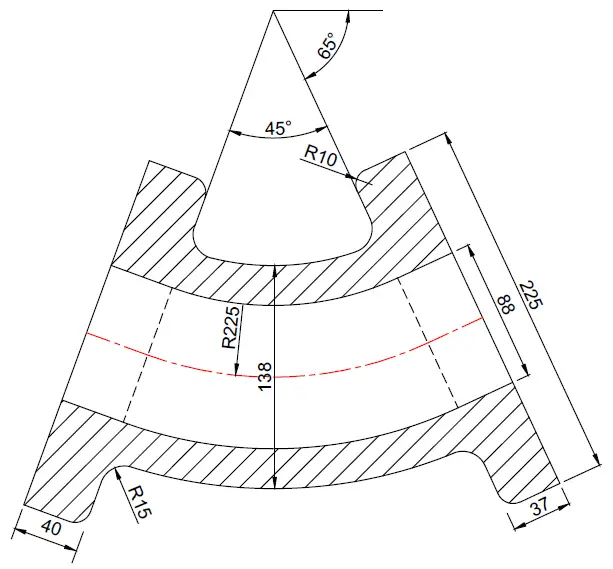
Today, we have a pretty straightforward image to replicate, and part of the task here is to use the HATCH command once the image is created.

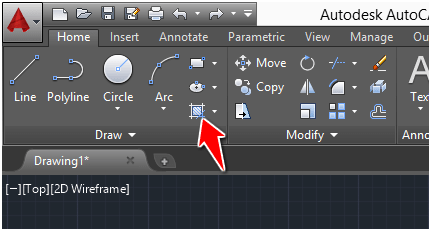
The image below can help you locate the HATCH command.

learn-AutoCAD-Bacis

To sum it up, they wont be lots of difficulties in this one. You need to be able to place objects however it is required in a 2D space. We tend to the end of this series, and one thing that you need to learn with these is to master the 2D space in AutoCAD. If you wish to jump into the 3D world later on, it is necessary you master how to move element in a 2D space.


LEARN AUTOCAD BASICS

FIGURE 1

learn-AutoCAD-Bacis