Graphic World

Categories
Articles Learning

Introduction To Auto desk AutoCAD | DAY 20

Learn AutoCAD basics: DAY 20

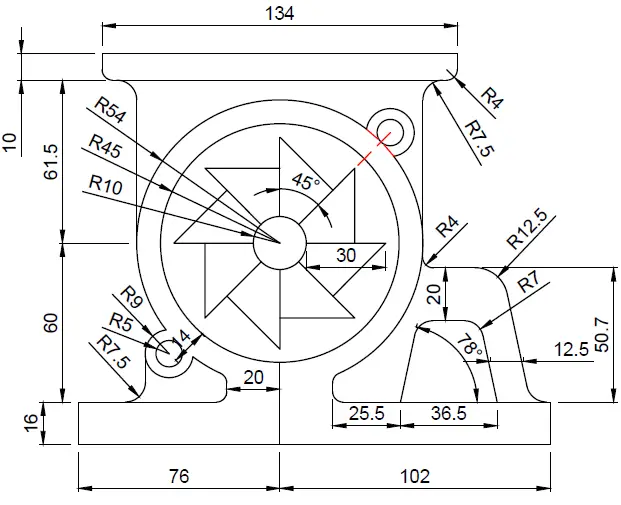
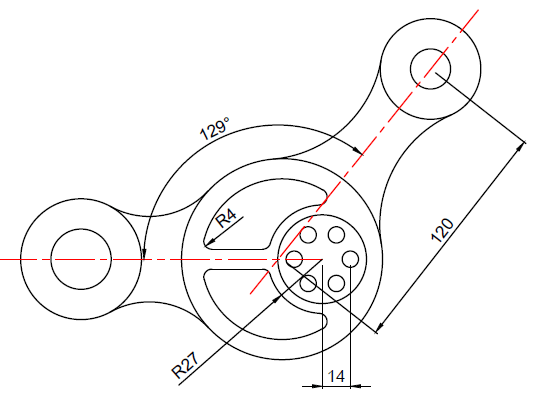
Nothing new under the sun. Here we come again with a bushy one.

Today, you will need the ARRAY command, the FILLET command and the OFFSET command (we made an extensive use of the OFFSET command in DAY 7). There is no need to mention that you will need the LINE command, the CIRCLE command, may be the ROTATE command too.

LEARN AUTOCAD BASICS

FIGURE 1

learn-AutoCAD-Bacis

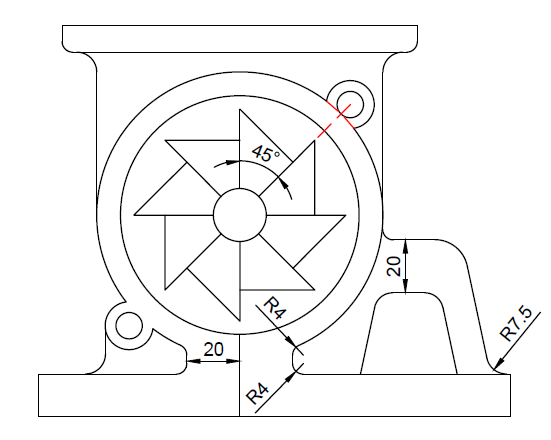
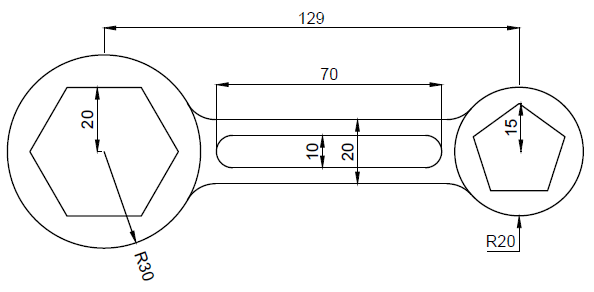
FIGURE 2

The following image provides some additional information needed to perform the exercise with success.

learn-AutoCAD-Bacis

For the sake of exercising with the HATCH command, you can HATCH the above project at the end if you wish.

Categories
Articles Learning

Introduction To Auto desk AutoCAD | DAY 17

Learn AutoCAD basics: DAY 17

There is not much hardship in the session we are about to have. This should be a piece of cake if you have been following the series since DAY 1.

Just for the sake of knowing, here are couple of things you need to know before diving into today’s exercise:

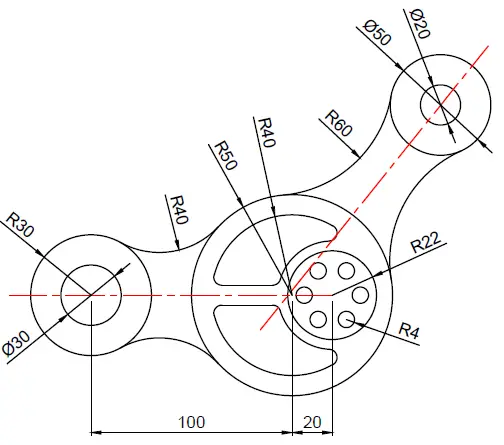
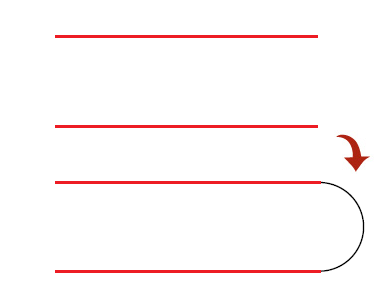
  • You need to have mastered the use of MIRROR command. You can avoid using it but using it the right way to go. After creating those arcs, Use the  MIRROR command to create a mirrored copy on the other side. The red lines can serve as a line of symmetry.
  • To create the arcs, you need to use the feature Tan Tan Radius of the CIRCLE command. If this is the first time you hear about this, it is not late to go and check it out.


LEARN AUTOCAD BASICS

FIGURE 1

learn-AutoCAD-Bacis

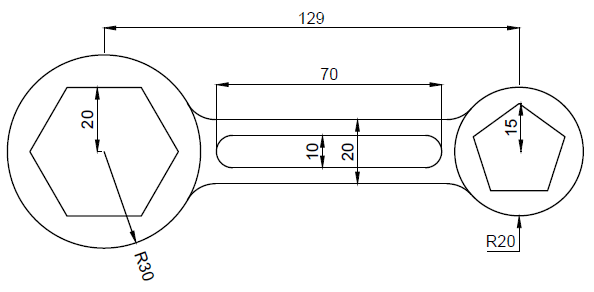
FIGURE 2

To avoid the preceding image to be too bushy, we’ve split information. You can find the remaining part of the information you need in the following picture.

learn-AutoCAD-Bacis

Categories
Articles Learning

Introduction To Auto desk AutoCAD | DAY 5

Learn AutoCAD basics: DAY 5

Hope we have providing some insights to you with this series of learning AutoCAD through exercises.

We previously worked on exercises that helped us master the following:

  • The use of the LINE command in AutoCAD
  • The use of the CIRCLE command in AutoCAD
  • The use of the TRIM command in AutoCAD
  • The USE of the UCS command in AutoCAD
  • and more


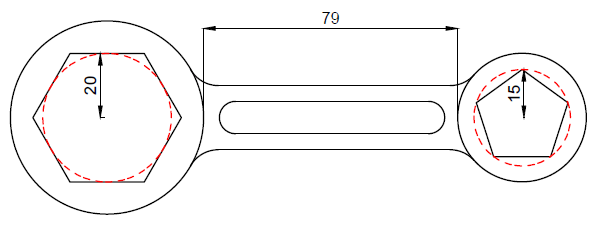
Today, we are going to continue learning and the object that will allow us do that is shown below.

learn-AutoCAD

As you can see the only added tools here is the POLYGON command which you will have to learn if you want to successfully replicate the image above.

LEARNING AUTOCAD BASICS

It is important to have you see the following.

learn-AutoCAD

It is important to understand that the two polygons do not have same characteristics. The Polygon on the left side of the image is a 6 side polygon circumscribed about a circle of R=20 and the Polygon on the right is a 5 side polygon inscribed in a circle of R=15. (illustrated on the image using the dashed red circle)

All fillet are R=10 units and remember that you need to learn how to create a polygon in AutoCAD before attempting to do this exercise.

A TRICK YOU CAN USE

It is possible to use the FILLET command on two parallel lines.

learn-AutoCAD

Using all we have learned in previous sessions you should be able to come out of this one without any hassle.

Categories
Articles Learning

Introduction To Auto desk AutoCAD | DAY 3


Learn AutoCAD basics: DAY 3

In this post we will be learning how to use the TRIM, CIRCLE command while trying to replicate the image below.

We have, in the last session, learned how to play with the LINE command and use Options of the Status bar. We will keep on playing with those features, adding up to them few others.
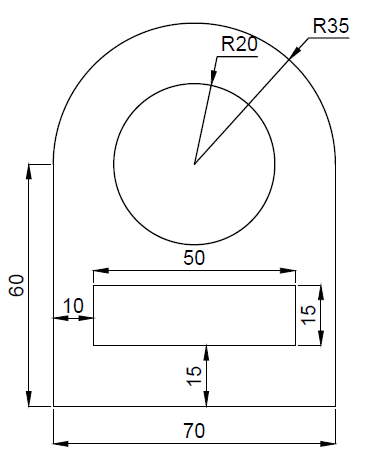
learn-AutoCAD

LEARNING AUTOCAD BASICS

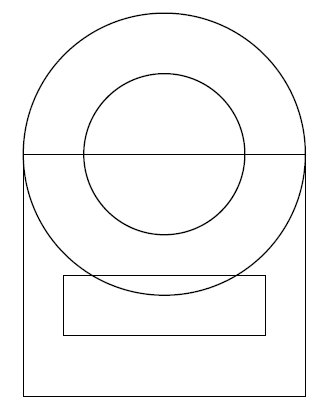
The primary figure that will help easily replicate this exercise is the following.
learn-AutoCAD

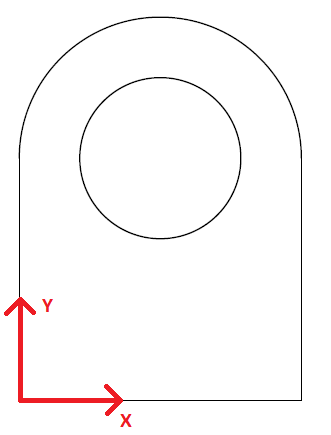
Two circles and two Rectangles.

What is the easiest way to get to this.

  1. Create the big rectangle using the LINE command
  2. Use the Center of the top side of the triangle to create the two circles.

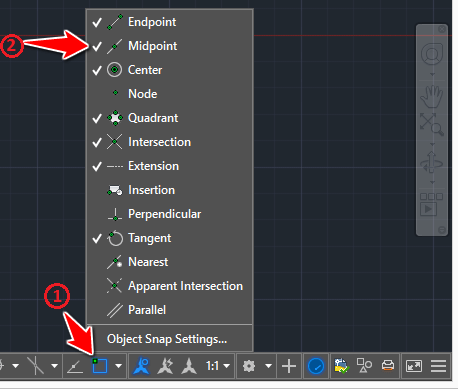
For step 2, you need to turn the Midpoint ON if you want to be able to find the center of that segment while creating the circle

Here is how to do it (right click on 1 and tick 2)
learn-AutoCAD

Now you should be at the following point
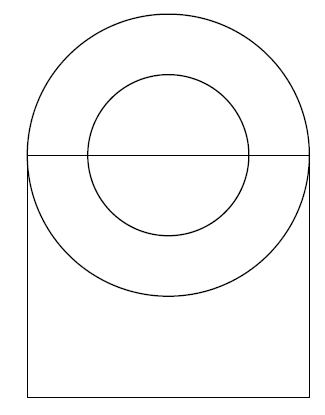
learn-AutoCAD

Trim the big circle and Erase the top side of the rectangle
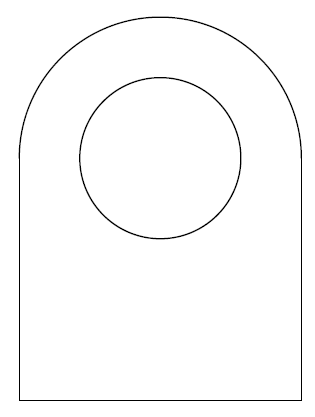
learn-AutoCAD

Now all we need to do is create the small Rectangle. Given dimensions given above, if we consider that the left corner of the figure is at the point of coordinates (0,0), we need to start the small rectangle at the point of coordinates (10,15)

What we will do.

  1. Move the UCS to the left down corner of the figure
  2. Start the line at the point (10,15)

HOW TO MOVE THE UCS TO THE LEFT DOWN CORNER OF THE FIGURE

  1. Type UCS
  2. Select the point
  3. Move the cursor on the x direction and click
  4. Move the cursor on the y direction and click

This is what you are supposed to get
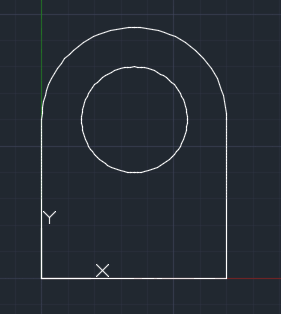
learn-AutoCAD

Notice the UCS

learn-AutoCAD

Now you can easily start the line at the point (10,15) and create the small rectangle.

EXERCISE
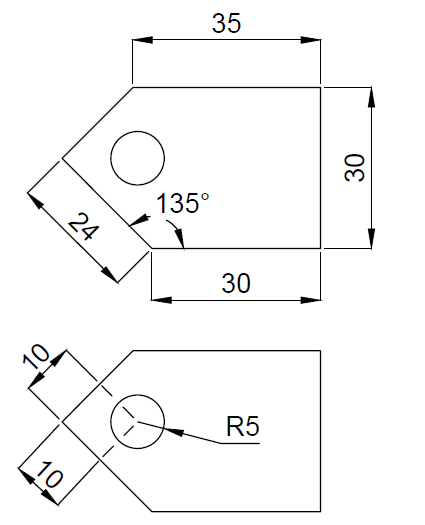
learn-AutoCAD