Graphic World

Categories
Articles Learning

Introduction To Auto desk AutoCAD | DAY 9

Learn AutoCAD basics: DAY 9

We slow down a little today, and we would like you to come back and use some basic commands we think we have not made use of enough.

Now, we are going to look at the CHAMFER command and play with the UCS command a little bit more than we did in the past days.

LEARNING AUTOCAD BASICS

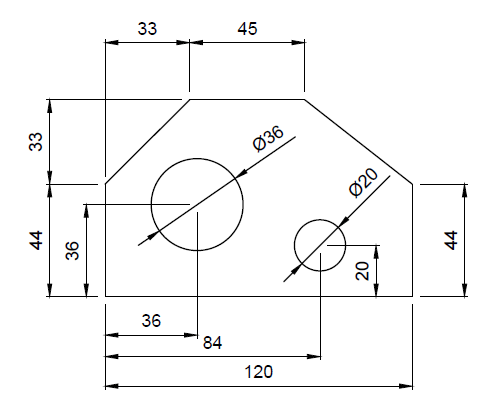
Here is the object we will try replicate in this session, pretty quick one huh!?
learn-AutoCAD

We have been into more difficult situation!


EXECUTION

Remember you can do it your own way, but here is how I will suggest you do it.

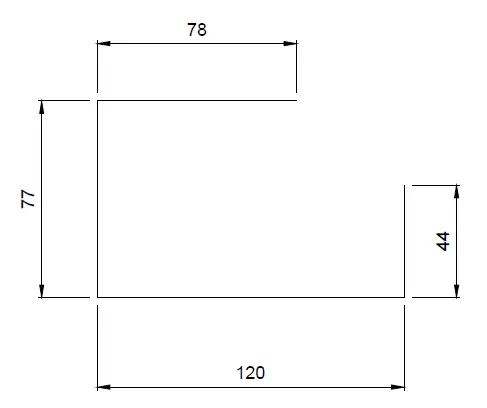
Start with the following. Four lines, you have all dimensions, pretty easy
learn-AutoCAD

Then, use a line to close the object. You need not to know the length of this line, just use those two points to get it.
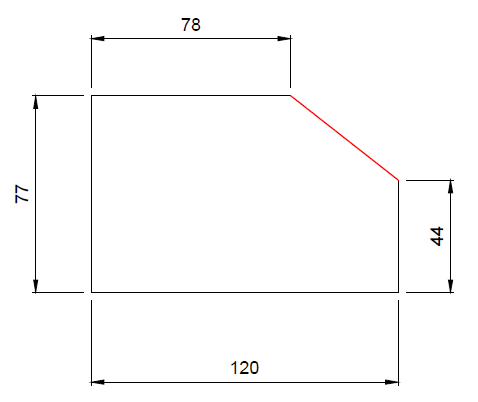
learn-AutoCAD

Now use the CHAMFER command on the left upper corner. The Chamfer distances are 33 x 33 units.

Learn how to use the CHAMFER command in AutoCAD
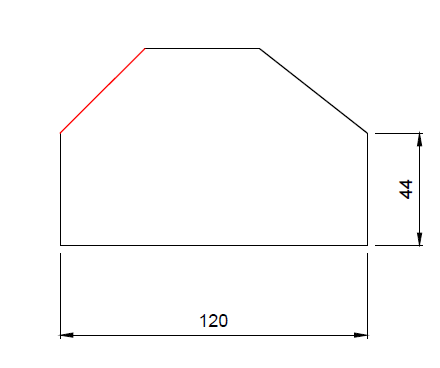
learn-AutoCAD

We have made an extensive use of the UCS command earlier. Move the UCS to the position shown on the image below, that will allow you to get the circles we are trying to create at their right positions.
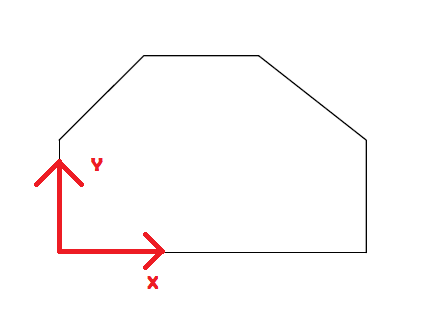
learn-AutoCAD

After Getting the UCS at the position shown above, the center of the bigger circle will be at the point of coordinates (36,36) and the center of the small circle will be at the point of coordinates (84,20)
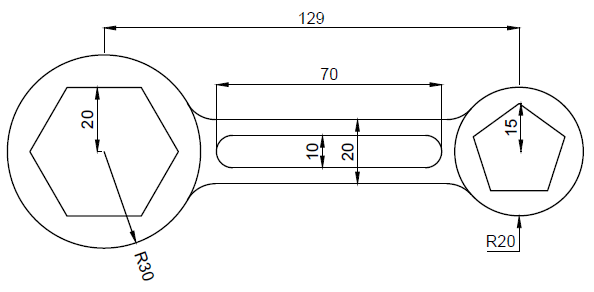
Categories
Articles Learning

Introduction To Auto desk AutoCAD | DAY 5

Learn AutoCAD basics: DAY 5

Hope we have providing some insights to you with this series of learning AutoCAD through exercises.

We previously worked on exercises that helped us master the following:

  • The use of the LINE command in AutoCAD
  • The use of the CIRCLE command in AutoCAD
  • The use of the TRIM command in AutoCAD
  • The USE of the UCS command in AutoCAD
  • and more


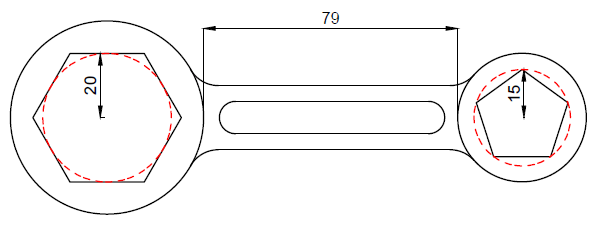
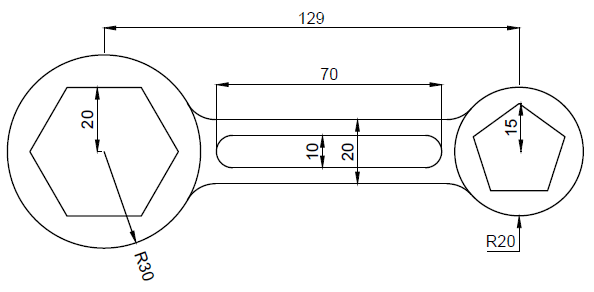
Today, we are going to continue learning and the object that will allow us do that is shown below.

learn-AutoCAD

As you can see the only added tools here is the POLYGON command which you will have to learn if you want to successfully replicate the image above.

LEARNING AUTOCAD BASICS

It is important to have you see the following.

learn-AutoCAD

It is important to understand that the two polygons do not have same characteristics. The Polygon on the left side of the image is a 6 side polygon circumscribed about a circle of R=20 and the Polygon on the right is a 5 side polygon inscribed in a circle of R=15. (illustrated on the image using the dashed red circle)

All fillet are R=10 units and remember that you need to learn how to create a polygon in AutoCAD before attempting to do this exercise.

A TRICK YOU CAN USE

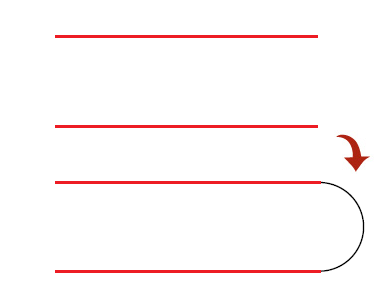
It is possible to use the FILLET command on two parallel lines.

learn-AutoCAD

Using all we have learned in previous sessions you should be able to come out of this one without any hassle.

Categories
Articles Learning

Introduction To Auto desk AutoCAD | DAY 4

Learn AutoCAD basics: DAY 4

The following should have nothing new to you if you have been here since the beginning. In this session, we are going to make good use of what we have learned so far.

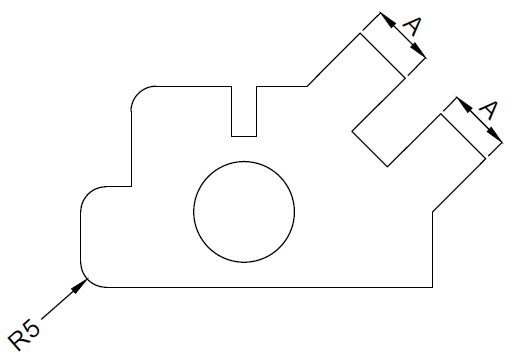
The image below will serve as today task.

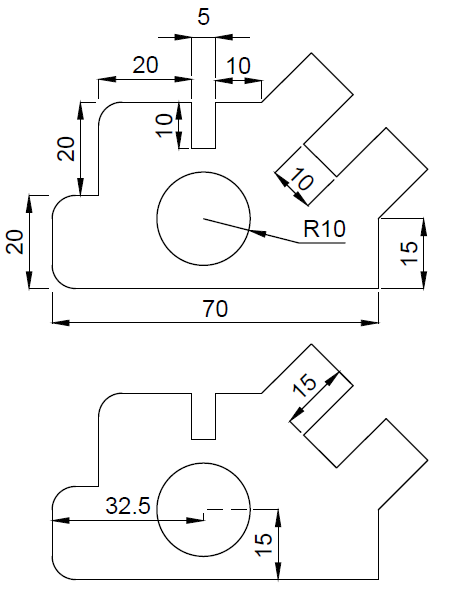
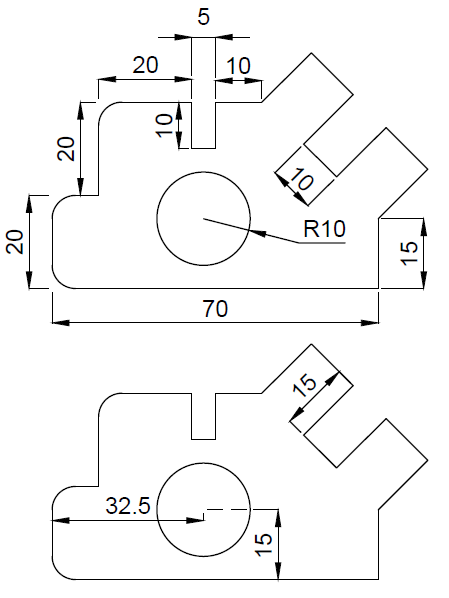
All Fillet in the following exercise are 5 units. (Learn more about the FILLET command in AutoCAD)

learn-AutoCAD

LEARNING AUTOCAD BASICS

You do not need to know the dimension of A to be able to accurately replicate the exercise. But it is crucial to know that the value of those lines are the same, that is the reason we called it A.

As I said earlier, all FILLET are R=5. We have 3 FILLET in the following exercise.

learn-AutoCAD

You will need to use the UCS command to place the circle at its appropriate distance using the same technique we used in the last session.

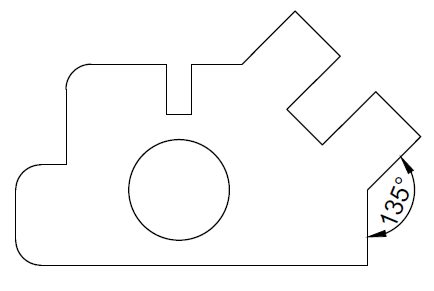
The following information will also be important to know.

learn-AutoCAD

Basically, there is nothing added than the FILLET command here. Ignore the FILLET, complete the figure and you can get those FILLET done at the end of the task.

Feel free to drop your thoughts below in case of any question or pinion.

Categories
Articles Learning

Introduction To Auto desk AutoCAD | DAY 3


Learn AutoCAD basics: DAY 3

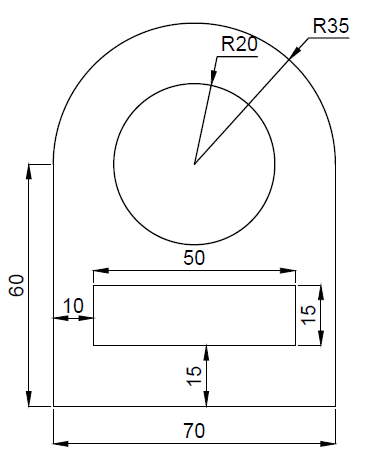
In this post we will be learning how to use the TRIM, CIRCLE command while trying to replicate the image below.

We have, in the last session, learned how to play with the LINE command and use Options of the Status bar. We will keep on playing with those features, adding up to them few others.

learn-AutoCAD

LEARNING AUTOCAD BASICS

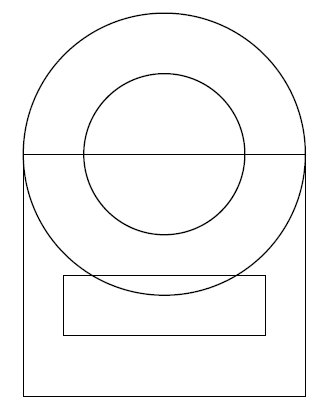
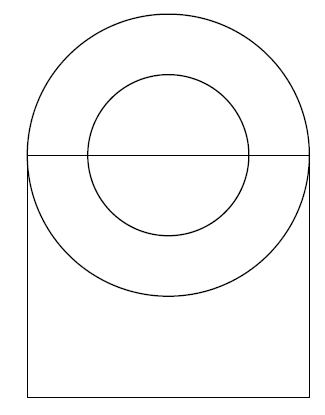
The primary figure that will help easily replicate this exercise is the following.

learn-AutoCAD

Two circles and two Rectangles.

What is the easiest way to get to this.

  1. Create the big rectangle using the LINE command
  2. Use the Center of the top side of the triangle to create the two circles.

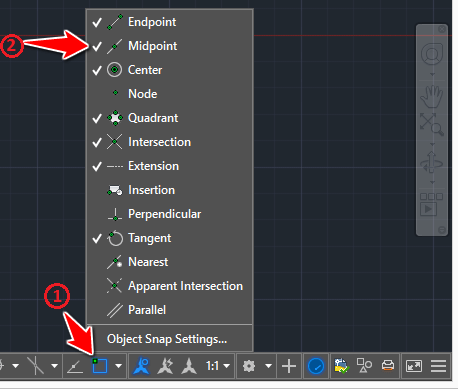
For step 2, you need to turn the Midpoint ON if you want to be able to find the center of that segment while creating the circle

Here is how to do it (right click on 1 and tick 2)

learn-AutoCAD

Now you should be at the following point

learn-AutoCAD

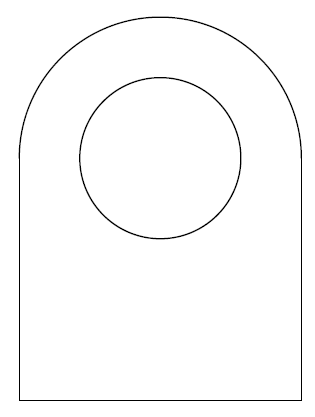
Trim the big circle and Erase the top side of the rectangle

learn-AutoCAD

Now all we need to do is create the small Rectangle. Given dimensions given above, if we consider that the left corner of the figure is at the point of coordinates (0,0), we need to start the small rectangle at the point of coordinates (10,15)

What we will do.

  1. Move the UCS to the left down corner of the figure
  2. Start the line at the point (10,15)

HOW TO MOVE THE UCS TO THE LEFT DOWN CORNER OF THE FIGURE

  1. Type UCS
  2. Select the point
  3. Move the cursor on the x direction and click
  4. Move the cursor on the y direction and click

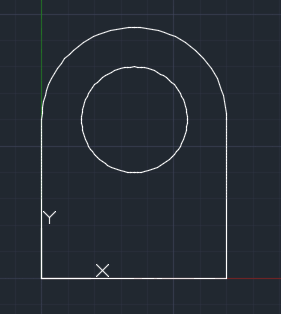
This is what you are supposed to get

learn-AutoCAD

Notice the UCS

learn-AutoCAD

Now you can easily start the line at the point (10,15) and create the small rectangle.

EXERCISE

learn-AutoCAD